 Blog
Blog
The Workbench – Joinery
Now that all the rough milling, sizing, and laminating is completed we can finally get started on some of the joinery and assembly for the workbench. All the main joints are drawbored mortise and tenon construction, so let’s get started sawing and chopping!
If you remember from last time, I made all the legs and stretchers the same size. To make life easy on myself, I’m going to do the same thing for all the mortise and tenon joints. With my legs and stretchers all cut to size, I marked out the 12 tenons needed ( 1 x each of the 4 legs, 2 x each of the 4 stretchers). I used my 1″ chisel to set my mortise marking gauge, then roughly found the center of one of the legs, and marked my gauge lines referencing the marked reference face. The tenon cheeks are pretty much the same size, but it shouldn’t matter as long as I always reference the same face.

Now I get started sawing, cutting the two vertical lines first, then working in from each side. I did all of these cuts with the Lie-Nielsen rip tenon saw.

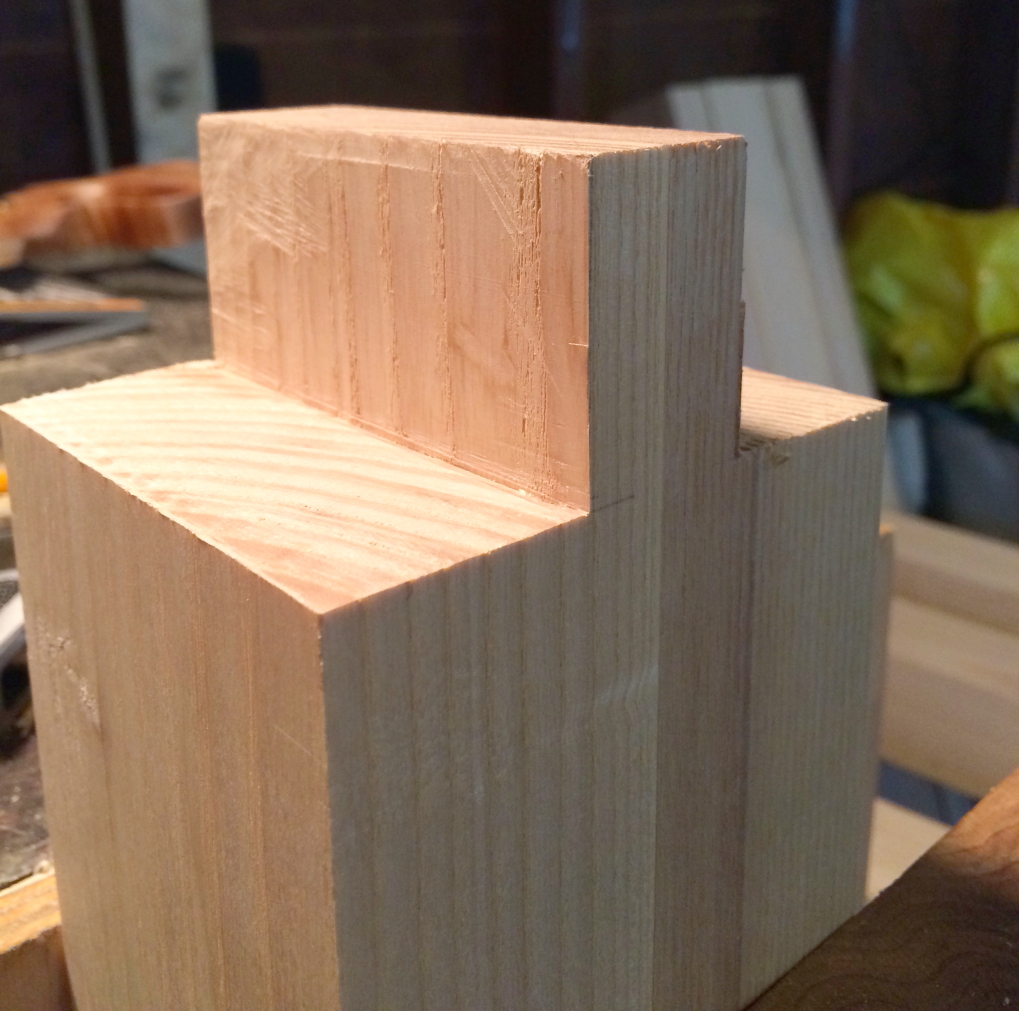
When the lines were all cut, I check for squareness, then trim up the tenon as needed with either a shoulder plane, rabbeting block plane, or chisel.


After all the tenons were cut, I had a nice set of 24 blocks for my daughter. She loves them!


Now it’s on to the mortises, which took quite a bit more effort than the tenons. I used the same mortise gauge to mark all the mortises towards the bottom of each leg (again, referencing the correct face). The bulk of the waste was removed with the brace and 1″ bit, then everything was cleaned up with that same 1″ chisel.


As you can see from the below picture, my mortises meet in the middle. No problem really, just means I’m going to have to miter the ends of my tenons a bit.

With the base sub-assembly complete and test fit, I clamped it all together, the flipped it over to mark the mortises on the underside of the top. It’s not a perfect size, it’s actually a little bit narrower than the top, but the important thing here is to get the front legs in line with the front of the top. I don’t really care if the back legs are flush with the back of the top.


Same procedure as before – bore out most of the waste…

then clean up with a chisel.

Now for a test fit!

It looks great, so I’m going to go ahead and drawbore the leg sub-assembly together. The pegs are about 1/2″ in diameter, with a healthy 1/8″ of drawbore action. This seemed to cinch everything up nice and tight. I’m using glue for these joints, but won’t for the top joints. If I ever want to take it apart I should just be able to drill out the top pegs to remove the legs.

Before I flipped everything over for the final time, I added a little support for the shoulder vise. I’m not sure if this is really necessary, but makes me feel better if I ever want to put something heavy on that section.

There we have it – flipped over and almost ready to go!


It was a bear to flip over, so I’m hoping I only have to do that once. The top of the top is obviously a bit messy with glue squeeze out, but a quick flattening did the trick there.
At this point I have a perfectly use-able workbench and I’ve got to say it’s a great size. It fits exactly where I was planning, and isn’t too large that I can’t move it around when I need too, or too small that it moves around when doing heavy planing. Now all that’s left is to finish up the vises, add some dog holes, and do some final finishing touches. Until then, I’m enjoying the bench so far!


5 COMMENTS
Thank you for these blog entries. I
independently made many of the same
decisions and was looking for any
benches that used the same ideas as
a sainty check. I’m going to use Rob
Cosman vice hardware, the rectangular
part of the bench is a beech Ikea
counter top halfed and stacked. Rest
is beech I stumbled upon years ago.
top halved and stacked
Hi Robert,
Sounds nice!
If there’s one thing I would change with my bench it would be better vise hardware (I’ve also added tool racks to the back). I’m sure I’ll make another bench again and would likely keep the shoulder vise design, but get nicer hardware. I’d also put on a proper tail vise. I like the little inset vise, but it certainly has it’s limits.
Good luck – thanks Robert!
Cheers,
Tim
Do you have a set of plans
Hi Brian,
I don’t have a formal set for my bench, but I’m happy to share the 3D model if you’d like. Just let me know and I’ll email it to you.
The bench is based on David Barron’s bench that was featured in “Furniture and Cabinet Making” magazine in the July 2015 edition #233. These was a set of plans included in the article as well.
Thanks Brian!
Cheers,
Tim
Yes that would be great